• home

Repair USB Flash Drives Broken

In other words, there’s only 2 levels of USB Flash drive recovery. Neither one of them can be fixed with super glue.

Broken Stems and Connectors, & Dead Drives

The first level deals with broken stems, or USB connectors and requires above average (not handyman) precision soldering skills.

Because of the size of the circuitry and parts, how the device receives power, as well as the difficulty of soldering,  unexpected damage is a frequent issue with DIY attempts on these drives. Soldering irons have the potential to burn or melt the printed circuit board, make the recovery much more difficult for a professional, and even cause the drive to be unrecoverable.
Solder can easily be crossed with points on the drive shorting out other components that are required for the drive to communicate with the computer. Another common mistake is when the prongs, or whatever contraption being used to connect the drive to a computer is improperly connected, the memory chips and/or other components can be damaged due to improper power being supplied.

If you have attempted to repair this yourself and the drive is not working, there is a good chance more damage has been caused and you may not be able to get your data back at all. As with all data recovery situations, you may only have one chance at recovering your data. Our engineers have seen many cases where failed DIY attempts have rendered the data lost forever.
USB-FLASH-RAW-manage-computer-viewUSB-FLASH-open-drive-need-to-format-drive
Below are the “how to” steps for the DIY tech.  Follow them very carefully.

Level 1: How to Repair Broken USB Stems

Here’s what you need:
  • Precision soldering iron
  • Solder and flux
  • Wire strippers
  • Small flat head
  • Scrap USB cable
  • Magnifying glass
Here are the steps to recovering from a USB drive that has physical damage to the stem, and is broken.
1. First you need to open the case of the USB device. You have to be careful here so you don’t damage the PCB board with whatever you are using to pry apart the plastic casing. A small flat head may do the trick, however there are some tricky cases out there, so it varies. An error during this step can ruin your chances of successful recovery. If you damage the NAND inside the casing, your data is lost forever.
2. Next visually examine the damage to the circuit board. You want to make sure there are breaks to the arms that are soldered to the PCB board. If there are not, you have another problem and are part of group 2. Once you have observed there is indeed a broken connection between the stem and the PCB board, you need to make sure the pads are not lifted.
pads-lifted-from-usb
This happens when the force to the stem pulls the solder pad off the board (where the arm actually connects to the board) . You will see what looks like a foot on the PCB side of the arm. At this point you should not continue, you need the help of a professional data recovery company.
Look for damage on the PCB:
  • Blown Resistors
  • Blown Capacitors
  • Cracks anywhere
  • Lifted Pads
  • Broken Crystal oscillator
  • Burn Marks
  • Damaged NANDs
You will not be able to continue with this repair if there is any damage other than broken arms.
3. If everything checks out after examination of the PCB and the pads are intact, take the scrap USB cable and prepare it  following these steps:
  1. Cut the female end off
  2. Strip the cable down to the four wires
  3. Expose about ¼ inch of the wire on each one
  4. Apply some solder to each wire
4. Carefully solder each one of the wires to the pads in the order they are supposed to go. Here is the order for most USB drives: with the pad side of the PCB facing you and the NAND or controller chip facing away: Left to right is black, green, white, and red. If you have  properly accomplished these steps, you should be able to plug the USB into a computer, get a blinking light, and copy your data over. A failed attempt will result in your drive not getting power, or you may burn some of the components of your drive listed above.
**You will either get your data back, or become part of Group 2. (if this worked for you please leave a comment below, share this post, and/or link to it!)

Level 2: If Your USB Drive is Not Recognized etc..

Due to the nature of the specialized equipment and knowledge required for this type of recovery, it does not fit within the scope of DIY data recovery, and is above and beyond the abilities of 99% of your typical “data recovery company”.  You will need to call a company that specializes in recovering FLASH drives and NAND storage technology. However, so you can understand what is involved here is a brief overview so you can adjust your expectations accordingly when getting prices for this type of recovery.
USB-FLASH-RAW-open-drive-not-accessibleno-NAND-need-to-formatThis level of recovery applies to the following types of USB Flash drive conditions:
  • Failed attempts at stem repair
  • Damaged circuit board
  • Damaged controller chip
  • Please Insert Disk Into Removable Disk Error
  • USB Device Not Recognized or Malfunctioned Error
  • Dead or Unresponsive Drive
  • Format Disk Error
1. This requires a NAND reader. These go for about $5,000. Then you need to find someone trained on the procedures of using the software that controls the NAND reader. This alone can take 3 months of doing recoveries every day.
2. Make sure that the reader supports the controller type on your USB drive. In order to do this you will need to remove the internals from the USB drive without damaging the PCB board and NAND. The controller type is found stamped on the controller chip. There are literally hundreds of different types of these. NAND recovery devices support most but not all.
3. Carefully remove the NANDs from the PCB. This requires a precision heating gun. Make sure to label them to know what side they came from on the PCB when there are multiple.
4. After you have successfully removed the NANDs Load them into the data compiler and let the software do it’s magic. (Wish it were that easy!)
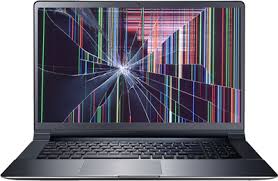
Repair and replace broken Laptop Screen

Repair and replace broken Laptop Screen,  If you’re a DIYer, replacing a broken laptop screen yourself is a great way to save cash, as most computer repair shops will quote you $150 to $300 for the job.
Here are step-by-step instructions on how to replace your broken laptop's LCD. 

Before you replace your laptop screen

Before doing anything, give your laptop a full look-over and inspection to ensure the screen really needs replacement. If the graphics card on the motherboard is dead, for instance, you may be wasting your time and effort on replacing a perfectly good screen. Additionally, if the laptop has been recently dropped or otherwise possibly physically harmed, you’ll want to double-check for other damage as well.
To ensure the graphics card is functioning, you can plug a desktop monitor or TV into the laptop, as most have a standard blue VGA monitor and/or a HDMI output. If the picture looks good on an external display, your graphics card is likely good and the screen is at fault. If you don’t get any picture, keep in mind some laptops require you to press certain function keys on the laptop to activate external display output. If you do that and video stilldoesn’t display, your graphics card and/or motherboard is likely broken, rather than your screen.
If the laptop outputs to another display successfully, use the computer for a while to ensure the keyboard and other laptop components appear to be functioning normally. 
Before you replace your laptop’s LCD, here are the caveats to the general steps that follow. This is not meant to be a guide for ultrabooks, two-in-ones, tablets, Macbooks, or other, more specialized notebooks, however. It’s more for average, run-of-the-mill laptops. But even then the general steps I discuss do not work for all such laptops. Some will require a different process and/or more work to replace the screen, such as accessing the motherboard by opening the main case of the laptop.

Finding a replacement laptop screen

Because of that crucial caveat, before buying a new LCD, it may be a good idea to try to remove the damaged screen first, to ensure you can perform the replacement. If, after following the first few steps the process looks different for your laptop, I recommend scouring Google and YouTube or finding a repair professional for further help on your exact laptop brand and model.
Finding a replacement LCD is typically easy—and you don’t have to pay the crazy prices the manufacturer usually wants. Just search eBay, Amazon, or Google with your laptop model number and the words LCD screen. You’ll find most regular screens can be had for as low as $50 to $80. If you aren’t finding anything, try other identification numbers from the laptop label or documentation. Some vendors have one or two different sets of identification numbers that could serve as your model number.
When shopping for the LCD, most sellers will alert you to compare the specs and placement of the video cable on the back of their screen to your current screen. This is another reason to crack open the laptop bezel before ordering a replacement. However from my own experience, if the seller says the screen is compatible with your exact laptop model, it usually works.

How to fix your broken laptop screen

Before starting, ensure you have the proper tools. Here’s what works for most laptops:
  • Table or other flat working area: You’ll need a spot to sit (or stand, if that’s your thing) with a flat area to work on your laptop. This gives you a reason to clean off that messy dining-room table or desk.
  • Small-head magnetic philips screwdriver: Not small like a mini screwdriver from an eyeglass repair kit, but I’d say between that size and a mid-sized screwdriver would work. If you don’t have a magnetic-head screwdriver, try to find a magnet big enough to magnetize the driver head. This helps the screws stick to the head, making it much easier to remove and replace the screws without cursing as they fall all over the place.
  • Safety pin or needle: This is for removing the cover stickers that are hiding the screws on your laptop’s surrounding cover, called the bezel.
  • Plastic putty knife or other thin object: This is optional, to aid in prying apart the screen bezel from the case. Personally, my finger nails usually do the trick. If you do use another object, ensure it’s thin enough but not so sharp that it will leave scrapes or other evidence of prying.
  • Small bowl or other container: This is for stashing the small screws—and keeping them safe from curious cats and children.
These general steps work for most laptops:
  1. Ensure the laptop is unplugged from the AC adapter. Remove the laptop battery as well.
  2. Find the round cover stickers that are hiding the screws on the screen bezel, the case surrounding the screen. These stickers are usually on the bottom of the bezel, near the screen hinges, when you have the screen opened. You should find one on each side of the screen.
  3. Use a sharp, pointy object—like an opened safety pin or needle—to help remove the cover stickers without damaging them. Stick it between the edge of the cover and bezel, and then pry the sticker away. Once removed, place the covers in a safe spot, with the sticky side up to help ensure there’s enough stickiness when you place them back on.
  4. Use your screwdriver to remove the now-exposed screws. Remember: righty-tighty, lefty-loosey. Some screws are easy to remove; others, not so much. But moving the screen into just the right position usually exposes the screws enough for removal.
  5. Carefully start prying the screen bezel away from the back side of the screen case. Work a fingernail or other thin, prying object into the crack around the outside of the screen. The bezel is usually secured to the back case with plastic snaps, so give it some force while prying—but not too brutish. You’ll hear the unsnapping of the fasteners when prying.
  6. Once you’ve unsnapped the screen bezel, it may or may not be easy to remove. If not, it’s likely stuck around the screen hinges. Moving the screen position up or down, with some gentle force if necessary, should free it fully.
  7. Once the bezel is fully removed, you’ll find the LCD secured to a metal trim frame on the left and right sides. Remove the two screws (one on each side, on the top) holding the trim frame pieces to the back screen case. Now, you should be able to lift the LCD (with the trim frame pieces attached) slightly away from the back screen case.
  8. On each of the trim frames’ sides, remove any screws that are securing it to the LCD. Most laptops have three screws on each side; however, the smaller laptop I photographed here doesn’t have these screws—the LCD is actually secured to the trim frame pieces by tape on each side.
  9. Now you should be able to set the LCD face-down onto the keyboard. Be careful not to put excessive force on the video cable attached to the back of the LCD.
  10. Disconnect the video cable from the back of the LCD. Though the laptop I photographed here has the connector on the very bottom, most laptops have the connector near the center. If so, keep in mind that the portion of the cable running down the screen is usually stuck on the back of the screen with some mild adhesive. Just gently pull the cables away from the screen. You usually must remove tape that’s securing the video connector to the back of the screen as well. When you get to the point of actually pulling the video cable out of the screen connector, it should unplug with little force.
  11. Once you've fully removed the broken LCD, simply place the new one face-down like you did the old one. Reattach the video cable to the connector and place the cables and any tape just like they were for the old one.
  12. Set the new screen up in the side trim frame pieces, then re-secure it like the old one was: usually three screws in each side of the trim frame pieces, and then a screw on top of each to secure it to the back screen case.
  13. When you get to the point of putting the bezel back on, just line it up and push/squeeze the bezel back into the snaps of the rear screen case. Before replacing the bezel screws, ensure the bezel is fully snapped in place and no crack exists around the edges of the screen case. Lastly, use that safely pin or needle to reattach the sticky screw covers.